____________________ > Ava
> System components
> Old Style
> Tools
> Asco rebuild kit for 8342 series valves 306192-ms
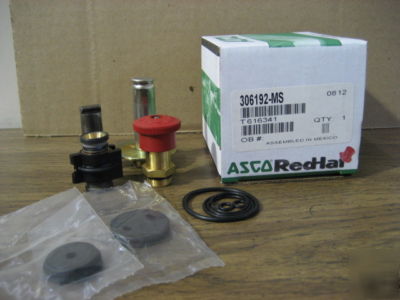
Asco rebuild kit for 8342 series valves 306192-ms
Check nameplate for correct catalog number, pressure, voltage, frequency and service. Never apply incompatible fluids or exceed pressure rating of the valve. Installation and valve maintenance to be performed by qualified personnel.
Provision should be made for performing seat leakage, external leakage, and operational tests on the valve with a nonhazardous, noncombustible fluid after disassembly and reassembly.
For maximum valve ambient and fluid temperatures, refer to chart below. Check catalog number prefix and watt rating on nameplate.
Depending on the medium and service conditions, periodic
inspection of internal valve parts for damage or excessive
wear is recommended. Thoroughly clean all parts. If parts
are worn or damaged, install a complete ASCO Rebuild Kit.
Incorrect Pressure: Check valve pressure. Pressure to valve must be within range specified on nameplate.
Excessive Leakage: Disassemble valve and clean all parts. If parts are worn or damaged, install a complete ASCO Rebuild Kit.
Valve Disassembly (Refer to Figure 4)
1. Remove piping from Cylinders A and B and disassemble valve in an orderly fashion. Use exploded views provided for identification and placement of parts.
2. Remove solenoid enclosure. See separate instructions.
3. Unscrew solenoid base sub-assembly and remove core spring guide and core spring.
4. Remove end cap screws (4), end cap and end cap gasket from valve body.
5. Pull sleeve/disc/spring assembly containing disc assemblies, disc spring and sleeve from valve body. Then remove sleeve spring, core and bonnet gasket.
Note: On suffix P valve constructions, the core contains three rider rings.
6. If cleaning is all that is required, do not remove body seat (exhaust), body seat gasket, end cap seat (cylinder), end cap seat gasket, or orifice gaskets. Remove these only if replacement seats and gaskets are available.
7. To remove body seat (exhaust) and seat gasket, insert an appropriate tool or a heavy gauge wire with a bent hook on the end through the center hole in the seat. Pull to dislodge seat. If seat will not dislodge easily, remove piping from exhaust port and push seat out with a thin rod through the exhaust port.
To remove end cap seat (cylinder) and gaskets, push seat from end cap, using thin blunt rod inserted through hole between Cylinder Port A and Cylinder Port B. When the end cap contains metering devices, apply compressed air through either pipe connection or the small vent hole in the end cap to force out the end cap seat with the gasket. If this fails, use the appropriate tool or bent wire described above to dislodge the end cap seat with the gasket.
8. All parts are now accessible for cleaning or replacement.
If parts are worn or damaged, install a complete ASCO