____________________ > Abingdon
> System components
> New Style
> Hydrolic Parts
> High pressure valves
> Dental implants parallel guide kit prosthodontics
Dental implants parallel guide kit prosthodontics
Dental Implants Parallel Guide Kit
The Parallel Drill Guide Kit has been designed to enable the dental surgeon to accurately locate and drill holes of two or more consecutive implants with optimal spacing, angulation and parallelism.
Guides and ensures complete vertical parallelism between the implants.
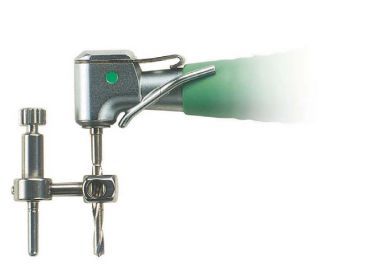
Located within the top of the block consists a screw (top) and the spring- loaded ball (inside). It allows the extension pin to be gradually stabilized at the desired length and inclination.
Permit variable bucco-lingual inclinations and mesio-distal locations relative to the central block. In the extension arm s free end are 2 holes for 2mm drills in perpendicular planes.
Optimal spacing enables the surgeon to locate the holes for the planned implants with the required inter-implant distance.
Optimal angulation enables the surgeon to drill in the most advantageous bucco-lingual angle possible, within anatomic limits.
There are 4 different central blocks:
Short and thin: 10mm length, 2mm diameter
Short and wide: 10mm length, 2.8mm diameter
Long and thin: 16mm length, 2mm diameter
Long and wide: 16mm length, 2.8mm diameter
There are 3 different extension arms:
Short 6 to 8 mm from the centerline of the central block to the holes in the free end of the extension arm.
Medium 9 to 11 mm from the centerline of the central block to the holes in the free end of the extension arm.
Long 12 to 14 mm from the centerline of the central block to the hole in the free end of the extension arm.
These are dual diameter pins where half their length is 2mm and a half is 2.8mm. They enable the surgeon to visualize the implant position and angulation.
How to use the Parallel Guide Kit.
1. Drill a 2mm pilot hole at the location of the first implant.
2. Insert the paralleling pin and check its position. Confirm with a radiograph if necessary.
3. Take one of the 2mm diameter central blocks and an extension arm appropriate to the desired distance between the implants. Assemble them with the 2mm hole in a vertical position. Place the central block in the drilled pilot hole.
4. Put the drill through the 2mm hole in the free end of the extension arm. It can be moved in both bucco-lingual and mesio-distal directions. The extension arm can be stabilized with the screw located on the central block. Some freedom of movement should be retained while drilling. Drill the second 2mm pilot hole. Repeat for each consecutive implant.
5. Rotate the end of the extension arm 90 degrees so that the 2.8mm hole is vertical. Place the 2/2.8mm paralleling pin through the extension arm and into the last pilot hole. Stabilize it with the screw on top.
6. Widen the pilot hole to 2.8mm. When the hole is widened to 2.8mm it will still be parallel to the previous pilot holes.
7. Take one of the 2.8mm diameter central blocks. Transfer the extension arm from the previous central block, maintaining the vertical orientation of the 2.8mm hole. Repeat the procedures in step 5 until all of the previously drilled pilot holes have been widened to 2.8mm.
8. After all holes have been widened to 2.8mm, insert the paralleling pins to check their positions. The holes can now be deepened if necessary. 3.3mm implants can now be inserted or the holes created with Parallel Drill Guide Kit can be widened to 3.2mm for 3.75mm implants, and up to wider implants.
p.s If you have any questions, please dont hesitate to ask ****@enlightdent.com